How To Install Synthetic Dreadlocks
Congratulations, queen!
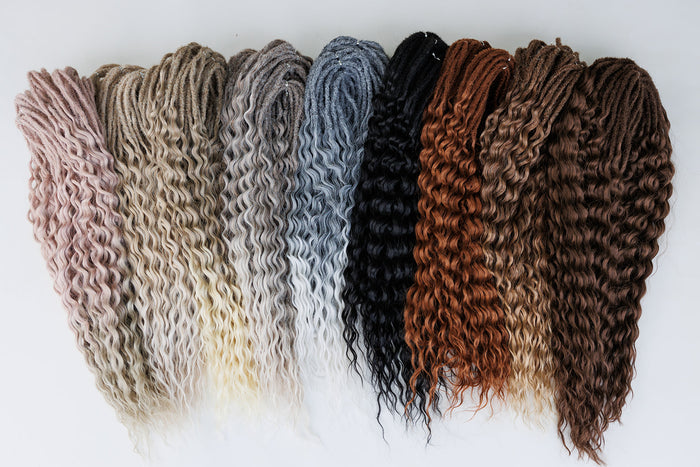
You’ve got your brand new set of synthetic dreadlock extensions in your hands and you can already picture how amazing you're going to feel once they're in. This is a big moment!
it’s bold, it’s beautiful, and it’s so you.
Before you dive in and start braiding, let’s talk prep. These are the three things I always do before every single install. They help me feel grounded, confident, and fully ready to make the most of this transformation. Think of it as a little ritual to honour your crown before the fun begins.
First, I get a fresh trim.
Nothing major, just enough to clean up the ends. Split ends can make takedown way harder, and we’re not about that breakage life. Clean, healthy ends will make your install smoother and your removal later on a breeze.
Second, I exfoliate my scalp like I mean it.
Dry skin buildup is one of the top reasons people feel itchy after installing dreadlocks. So I go in with my hands or a scalp brush and give it a good scrub. It’s one of those small steps that makes a big difference in how comfortable and clean everything feels.
Third, I detox the dreadlocks.
Yes, even if they’re brand new. Synthetic hair comes coated with stuff that helps make it flame-resistant, and that’s not something I want resting against my skin. So I give every set a soak and a rinse with Dreadtox to make sure they’re fresh, soft, and ready to wear.
You don’t need a hundred fancy steps. Just these three will set you up for a smoother install, a happier scalp, and a more empowered start to this journey.
Let’s Get You Set Up: Sectioning Your Scalp
Before we dive into installing your dreadlocks, let’s start with the foundation: sectioning. It’s not just about neatness…it sets the tone for how your hair will look, feel, and last.
One of the simplest ways to section is using a brick-lay pattern, like the one you see below. Think of it like laying the groundwork for a garden, every part has a place, and it helps everything fall more naturally once you're done.
Now, here’s the thing: some women like to part their entire head before they start. It gives them a sense of flow and control, and they can just focus on the install after. Others prefer to part as they go, especially if they’re feeling things out. Both ways are beautiful and we’ll walk you through whichever one feels like a better fit for you.
No pressure to get it perfect. All you really need is a rat-tail comb, some clips, and a little patience. Neat parts and consistent sizes will make the rest of your install so much easier.
You’ve got this.!
Step 1: It Starts with a Simple Part
This is where the magic begins. Grab your comb, take a breath, and part your hair. It doesn’t need to be perfect….just clean enough to give your dreadlock a strong foundation!
Step 2: Clip It and Claim Your Space
Now that your part is in place, it’s time to clip away the rest of the hair and make room to focus. This moment is about claiming one small section at a time and giving it your full attention. Don’t rush it…setting up with care now will make the rest of your install feel so much smoother.
Think of it like clearing space for your crown to settle in just right!
Step 3: Precision Without Perfection
Use the tip of your comb to create a clean, centered box. This part doesn’t have to be perfect….it just needs to make sense for the way your dreadlocks will fall. Clean sections help reduce tension and give your install a polished look, but don’t stress over symmetry. This process is about intention, not perfection.
Step 4: Lift, Check, Adjust
Lift that section of hair straight up and double-check your part. This is the moment to make small adjustments so the dreadlock lays comfortably once it’s in. Don’t rush through this! It’s like lining up your energy before anchoring it down. Precision now means less pulling later.
Step 5: Balance the Section
Stretch the parted hair gently to make sure both sides feel even. This helps you see if the section is too thick or too thin before adding the extension. You’re not just placing hair…you’re building structure. It’s okay to pause and feel it out!
Step 6: Anchor the Strand
Time to place your dreadlock extension. Position the braided section flat against the scalp so it blends seamlessly and is gentler against your scalp. This is where the claws come in handy….they help hold everything steady so you can focus without fighting flyaways or slipping strands. It's all about making the install feel smooth and stress-free.
Step 8: Begin the Braid Down
Start braiding just like you would a regular three-strand braid….two pieces of natural hair and the dreadlock as the third. Keep your hands close to the scalp and braid with intention. This isn’t just hair, it’s energy being rooted into place. Every movement is part of your ritual.
Step 9: Wrap It and Secure with a Wild Band
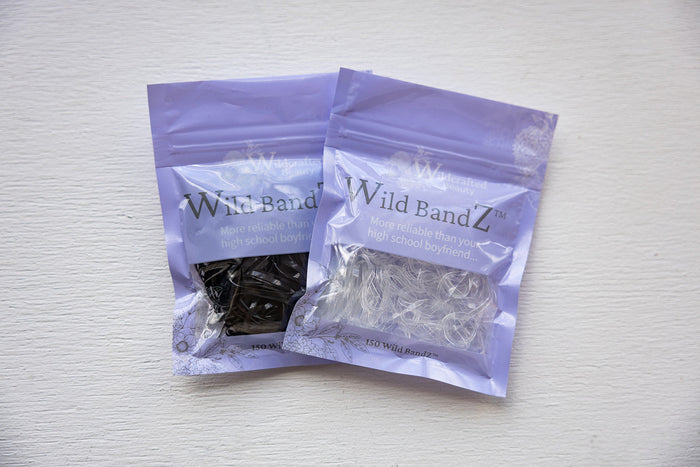
Once you finish braiding the strand all the way down, it’s time to lock it in. Take one of our Wildbandz and gently wrap it around the braid base to hold everything in place. Move it around the braid slightly so it doesn’t stack too tightly in one spot, this helps distribute tension and keeps your install more comfortable. If you want extra hold, go ahead and add a second band. This is your crown, so make it feel secure, soft, and fully yours.
You did it! You installed your first dreadlock extension and now all that’s left is to keep going. Keep sectioning your scalp into clean little boxes and work your way up, row by row. A good rule of thumb is to start with three boxes at the nape of your neck, then build upward from there. You can pre-section your entire head if that helps you stay focused, or take it one box at a time and flow with the process.
Another Way to Do It: The Latch Hook Method
If braiding feels like a lot or your hair’s just too short to get a good grip…take a breath!
There’s another way that’s just as beautiful and a whole lot simpler.
It’s called the Latch Hook Method, and it’s perfect for beginners or anyone who wants a softer, easier install without sacrificing the final look.
Here’s how it works:
Step 1: Insert the hook into the dreadlock
Grab your latch hook tool and slide it through the top of the Venus part of the braided extension. You’ll want the hook to come out through the centre of the braid—that creates a little pathway for your natural hair to slide right in.
Step 2: Pull the hair through the dreadlock
Once your natural hair is gently hooked onto the end of the Venus strand, go ahead and pull it through the centre of the dread using your latch hook. Take your time here—slow and steady is best. You’re guiding your own hair into place, letting it sit safely and neatly inside the extension. It should feel snug, but not tight. Just secure enough to stay put and move with you.
Step 4: Tighten, secure, and braid
Once your hair is all the way through, gently slide the dreadlock up until it rests right at your scalp. You’re not forcing it…just guiding it into place so it feels secure without pulling. From here, take both your natural hair and the Venus strand and begin braiding downward. Keep your tension even and relaxed as you go. Braiding helps your hair blend into the extension beautifully and gives everything a smooth, finished look that lasts.
If you have shorter hair, don’t worry! Use more clips to keep everything neat, and start each section with a rubber band for extra control. If the hair is really short—like a little nub—you can always double up on rubber bands to secure it to your extension.
Just remember: it’s okay if it doesn’t look “perfect.” The goal is comfort and consistency, not perfectionism.
Want your install to feel easier and more fun? Here are a few tips that make all the difference:
-
Block out half a day for your install. This takes time, queen! so make it a vibe. Light a candle, play your favorite playlist, and make a day out of it.
-
Have a friend help with the back rows or just keep you company. Everything’s better with good energy around!
-
Use Cooling Veil or a water spray to lightly mist the hair and relax the scalp, this also helps flyaways stay in place without soaking your strands.
-
Stick with Wildbandz: for securing each braid. They’re soft on your strands, they don’t snap like other rubber bands, and they’re literally made for this!
And finally….if you’re struggling with parting near the ears or the base of the neck, try switching up your parting direction. Some dreadlocks will lay better when parted vertically, while others feel more natural when placed diagonally or horizontally. Listen to your head shape, and trust your hands.
This is your crown. Take your time. Breathe through the process.
And most of all…..enjoy it!
You're not just putting in hair. You’re putting on confidence!
And don’t forget! when you purchase your set from Wildcrafted Beauty, you’ll receive access to a full step-by-step dreadlock video install course to guide you every step of the way.
2 comments
-
I’m a bit confused about where to start braiding my hair, specifically regarding the location of the Center dread part. If that makes any sense, I would love to watch a tutorial. I’ve only used single-ended dreadlocks in the past, and the few double-ended dreadlocks I’ve tried were dreads- not a unique combination like yours that involve a dread section and braised section in one Loc..
I visited your website and reviewed the step-by-step instructions. Since I’m a visual learner, videos would be more helpful for me. If that’s possible, I would greatly appreciate it. Regardless, your product is incredibly beautiful.
carla on
-
I have very long hair and want to add body and interest. Will this work with long hair?
Sunni Jaramillo on


